Pin Bar Reversal Strategy: Entry Rules and Trade Setup Guide

📚 Price Action Trading Mastery — Part 3 of 15
- Part 1: Price Action Trading 101: Reading the Chart Without Indicators
- Part 2: Support and Resistance: How to Draw Levels That Actually Hold
- Part 3: The Pin Bar Reversal: Rules, Confirmation, and Real Entry Examples (you are here)
⚡ Key Takeaways
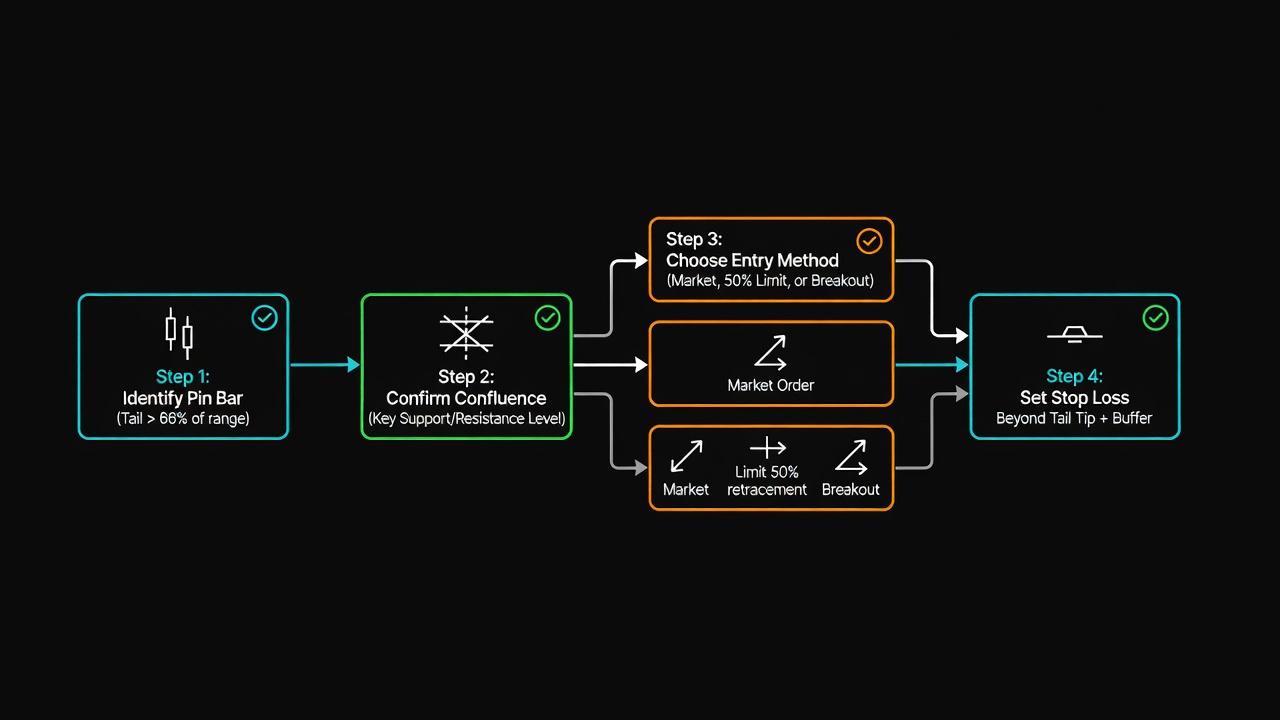
- A valid pin bar requires a tail that takes up at least two-thirds of the total candle length.
- Location dictates profitability; only trade pin bars that reject key support or resistance levels.
- Using options spread structures allows you to leverage pin bar entries while strictly capping downside risk.
Most retail traders blow up their accounts by trading every single single-candle pattern they spot. In Part 3 of our Price Action Trading Mastery series, we turn the pin bar from a beginner trap into a high-win-rate reversal trigger.
You will learn the strict visual rules for identifying legitimate pin bars and how to execute entries with precise risk management.

Anatomy of a Valid Pin Bar Reversal
A pin bar, short for Pinocchio bar, represents a swift rejection of a price level. The long tail shows that market participants pushed price aggressively in one direction, only for institutional liquidity to step in and overpower them before the close.
Not all long-tailed candles qualify as tradeable pin bar reversals. To filter out low-quality noise, you must enforce strict structural parameters on your charts.
| Candle Feature | Requirement for Valid Pin Bar | Why It Matters |
|---|---|---|
| Tail (Wick) Length | At least 66% (2/3) of entire candle range | Proves heavy price rejection and supply/demand absorption. |
| Real Body Size | Maximum 33% (1/3) of entire candle range | Shows the market failed to sustain momentum in the direction of the tail. |
| Body Placement | Completely within the upper or lower third | Confirms buyers or sellers dominated the candle close. |
| Nose (Opposite Wick) | Very small or non-existent | Indicates strong closing momentum with minimal pushback. |
A bullish pin bar features a long lower tail rejecting lower prices, with the real body sitting at the top of the candle range. Conversely, a bearish pin bar sports a long upper tail rejecting higher prices, with the body clamped at the bottom.
As we established in Part 1, reading pure price action requires evaluating who controls the close. When a candle closes near its extreme opposite from the tail, aggressive liquidity has taken control.
Location Is Everything: Confluence with Key Levels
A textbook pin bar standing alone in the middle of a consolidation zone is entirely useless. Pattern geometry means nothing without context.
High-probability pin bar setups occur strictly at major structural levels. In Part 2, we covered how to draw support and resistance levels that actually hold.
When a bullish pin bar’s long tail pierces a key horizontal support level and immediately bounces, it triggers a liquidity sweep. The big market players drove price past support to trigger retail stop losses, absorbed that sell volume, and pushed price back up.
Look for pin bar confluence at key support or resistance, dynamic moving averages, or Fibonacci retracement levels. Without key level confluence, pass on the trade every single time.
Free For Traders
Get Free Weekly Trade Ideas Sent Straight To Your Phone
Join thousands of traders who get high-probability setups delivered every week — no cost, no catch.

The 3 High-Probability Entry Strategies
Once a valid pin bar forms at a key level, you have three distinct methods to enter the trade. Each entry style balances execution certainty against risk-to-reward efficiency.
The Market Entry executes immediately upon the candle close. You guarantee inclusion in the trade, but your stop loss distance is wider, which reduces your position sizing potential.
The 50% Retracement Limit Entry places an order at the midpoint of the pin bar’s total range. This offers tighter stop loss placement and superior risk-to-reward ratios, but you risk missing the move entirely if price rockets away without pulling back.
The Breakout Stop Entry places a stop-entry order just beyond the nose of the pin bar. This option provides price confirmation that momentum is moving in your intended direction before your order fills.
| Entry Style | Trigger Mechanism | Primary Advantage | Primary Trade-off |
|---|---|---|---|
| Market Entry | Order fills on candle close | 100% fill probability | Wider stop distance, lower R:R |
| 50% Limit Entry | Limit order at candle midpoint | Maximum R:R potential | Risk of missing fast-moving trades |
| Breakout Entry | Stop order 1 tick past candle nose | Momentum confirmation | Slightly worse fill price |
Options Trade Walkthrough: Trading a SPY Pin Bar Reversal
Let’s walk through a concrete numeric example using SPY stock options to demonstrate how to execute a bullish pin bar setup with asymmetric risk.
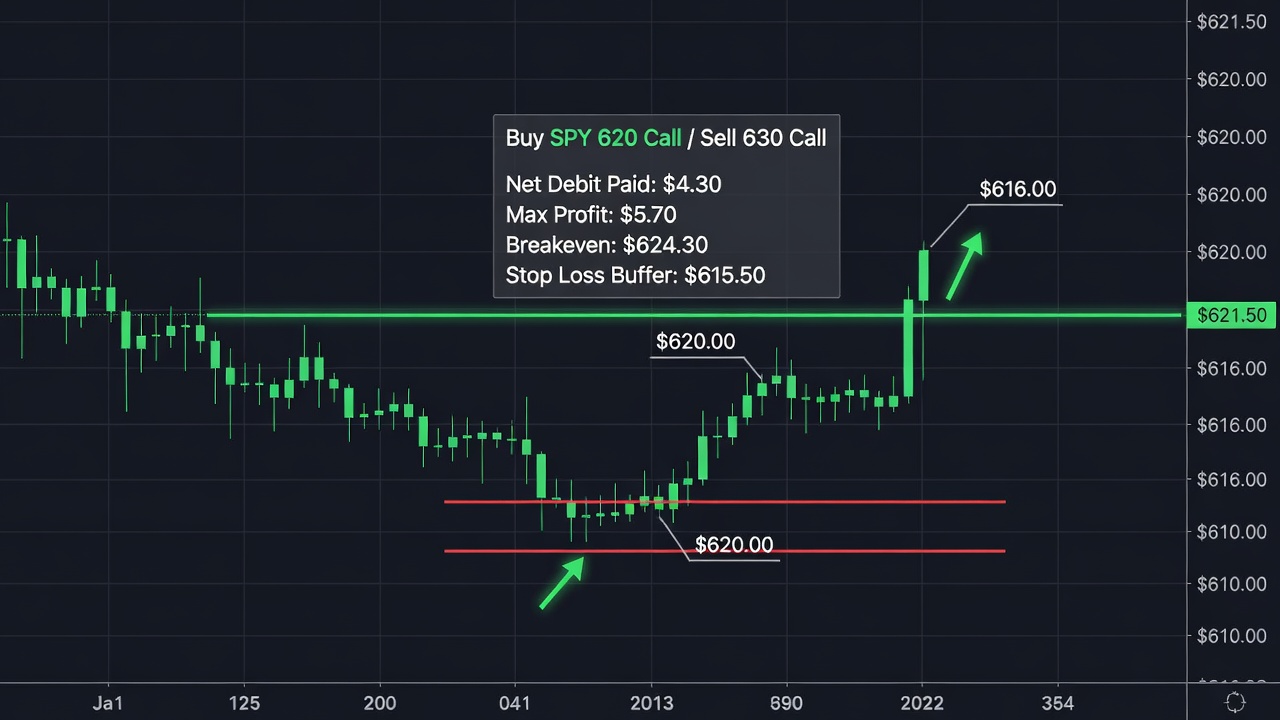
SPY pulls back to a major daily support level at $620.00. A crisp bullish pin bar forms on the daily chart with a high of $622.00, a low of $616.00, and a close at $621.50.
The total candle range is $6.00 ($622.00 minus $616.00), while the lower tail spans $4.00 ($620.00 minus $616.00). Because the lower tail makes up 66.7% of the total candle range, this meets our strict structural requirement.
Instead of buying underlying shares, we trade a 30-day DTE Bull Call Debit Spread to leverage our capital with defined risk. With SPY trading at $621.50 near the close, we execute the following option trade:
We buy the SPY 620 call for $8.40 and sell the SPY 630 call for $4.10. This results in a net debit paid of $4.30 per contract ($430 total risk).
The maximum profit on this spread is $5.70 ($10.00 strike width minus $4.30 net debit), yielding $570 per contract. The trade breakeven price at option expiration sits at $624.30 ($620 strike plus $4.30 debit).
Our structural invalidation point on the chart is $615.50, placed $0.50 below the pin bar’s tail low of $616.00. If SPY breaks $615.50, the bullish reversal thesis fails, and we close the option spread manually to preserve capital.
Common Mistakes to Avoid
The most frequent error traders commit is taking pin bars against a dominant, strong trend. A single bullish pin bar forming inside a severe, high-volume markdown channel usually fails as a simple pause before further selling.
Another major mistake is ignoring the size of the pin bar relative to surrounding candles. A tiny pin bar with a $0.50 range inside a series of $3.00 volatility candles lacks the institutional weight required to turn the market around.
Traders also ruin their edge by placing stop losses right at the extreme tip of the pin bar tail. Market noise and spread widening frequently sweep those exact levels before the price moves in the intended direction; always leave a small buffer beyond the tail low or high.
From Find Better Trades
Know EXACTLY What To Trade At 9:30 AM
Morning Opening Range Breakout setups delivered before the bell. While everyone else is scrambling, you already have your plan.

Frequently Asked Questions
What is the best timeframe for trading pin bar reversals?
Higher timeframes like the 4-hour and daily charts offer the highest win rates and cleanest market signal context. Lower timeframes below 15 minutes produce frequent false signals due to high market noise and algorithmic stop runs.
Should I trade pin bars that close as the opposite color?
Yes, as long as the structural tail ratio holds, color is secondary. However, a bullish pin bar that closes green carries slightly higher probability than one that closes red because buyers pushed price into positive territory before the close.
How do I set my stop loss on a pin bar trade?
Place your stop loss 5 to 10 ticks beyond the tip of the pin bar tail. This buffer prevents premature stop-outs from minor market noise while keeping your structural thesis intact.
Get ready for Part 4 of our series, where we master “Inside Bar Breakouts: A Complete Trading Guide” to capture explosive trend continuation moves.
📈 Want More? Join Our Free Trading Community
- Trading Strategy Guides Telegram — daily strategy tips and market insights
- Find Better Trades Telegram — free trade signals delivered to your phone
- Find Better Trades on YouTube — live trade breakdowns and tutorials