The Complete Guide to Trading SMC Inducement & Breaker Blocks

Trading SMC inducement paired with breaker blocks gives retail traders a direct window into institutional liquidity traps across major Forex pairs. Smart money constantly engineers fake breakouts to grab liquidity before driving price in their intended direction. By combining an inducement liquidity sweep with a failed order block that flips into a breaker block, you gain a high-win-rate strategy that identifies exact institutional turning points with minimal drawdown.
What Is SMC Inducement and Breaker Blocks?
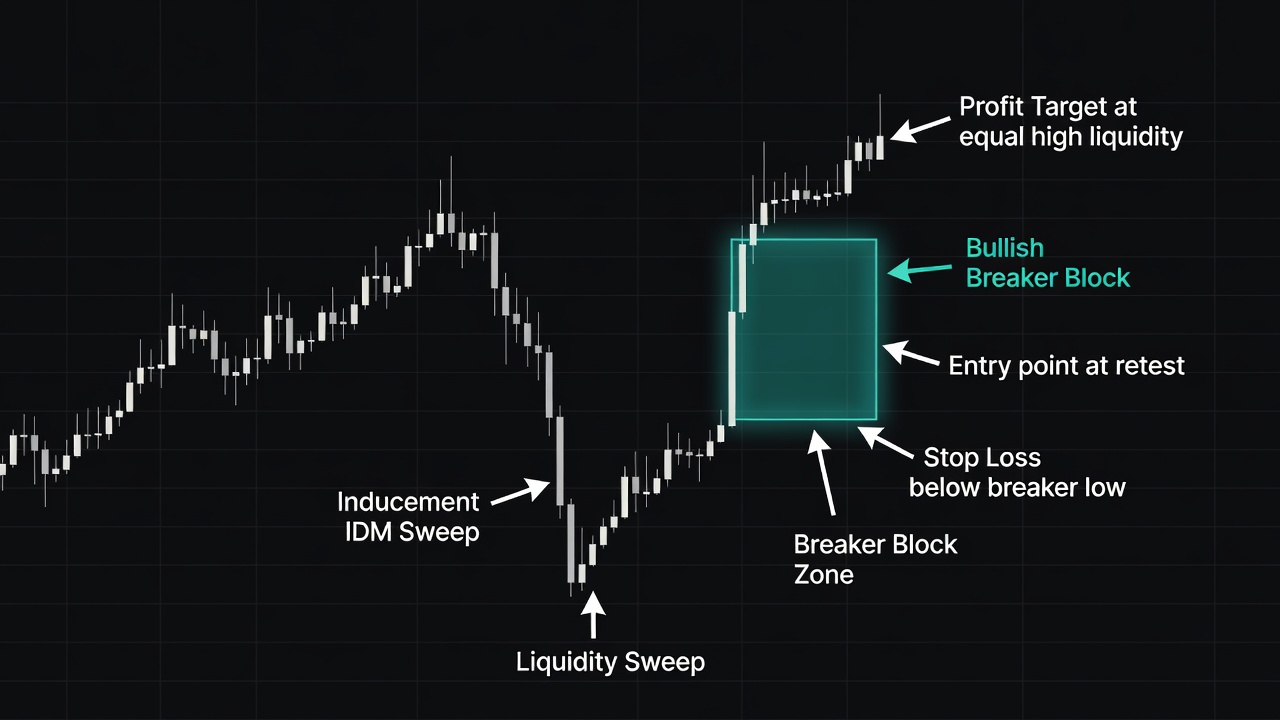
SMC Inducement (IDM) refers to subtle price traps created by institutional traders to bait early retail positions before sweeping their stop losses. A Breaker Block is a failed order block—a key supply or demand zone that gets violently broken through during liquidity engineering, flipping its role from support to resistance or vice versa. When an inducement sweep directly feeds into the creation of a breaker block, it forms one of the most reliable Smart Money Concepts reversal patterns available in Forex majors.
Why This Edge Works
Institutions operate under strict liquidity constraints due to massive order volume. They cannot simply buy 10,000 lots of EUR/USD without slippage unless sufficient sell orders exist on the other side. To generate that sell liquidity, market makers push price below obvious short-term lows or recent structural points, triggering retail stop-loss market sell orders. Once these stops get filled, institutional buying power fills at discount prices, driving price back through recent order blocks. The order block that failed under institutional pressure becomes a breaker block, acting as a magnet for price retests before the real directional move expands.
The Setup Rules
To identify and execute a valid SMC Inducement Breaker Block setup on major Forex pairs like EUR/USD or GBP/USD, follow these strict structural guidelines:
- Timeframe Alignment: Identify key market structure on the 1-Hour or 4-Hour timeframe, then refine your entry parameters on the 15-Minute or 5-Minute timeframe.
- Locate the Inducement (IDM): Spot an obvious minor swing low (for bullish setups) or minor swing high (for bearish setups) formed prior to a major liquidity sweep.
- Liquidity Sweep Execution: Price must aggressively push past the inducement level to capture retail stop orders, executing a clear liquidity sweep without closing significantly beyond major higher-timeframe structure.
- Structure Shift (CHOCH / BOS): Following the sweep, price must aggressively reverse and break the immediate swing structure, creating a Change of Character (CHOCH) or Break of Structure (BOS).
- Identify the Breaker Block Zone: Highlight the last down-close candle before the strong bullish push (or up-close candle before a bearish push) that was breached during the liquidity sweep. This broken zone now serves as your Breaker Block.
Free For Traders
Know What To Trade BEFORE The Opening Bell
The Big Dipper Dashboard hands you curated high-probability setups every single morning — free.

Entry Trigger
Your entry executes as soon as price returns to mitigate the newly formed Breaker Block zone after the structural shift. For limit order traders, set a limit order directly at the distal boundary (outer edge) of the Breaker Block zone as price retraces. For confirmation traders, wait for price to touch the Breaker Block zone on the lower timeframe and print a 1-minute or 5-minute engulfing candlestick or lower-timeframe CHOCH before entering at market price.
Stop Loss & Profit Target
Risk management must remain strict and formulaic to preserve your mathematical edge:
Stop Loss Placement: Place your stop loss 2 to 3 pips beyond the invalidation level—specifically below the extreme low of the liquidity sweep for bullish trades, or above the extreme high for bearish trades. Never widen a stop loss once established.
Profit Targets: Target the opposing major liquidity pools, such as unmitigated supply/demand zones or equal highs/lows on your primary timeframe. Aim for a minimum Risk-to-Reward ratio of 1:3, scaling out 80% of your position at the first major structural liquidity point and letting the remaining 20% run toward daily liquidity targets.
Trade Walkthrough: What It Looks Like on a Chart
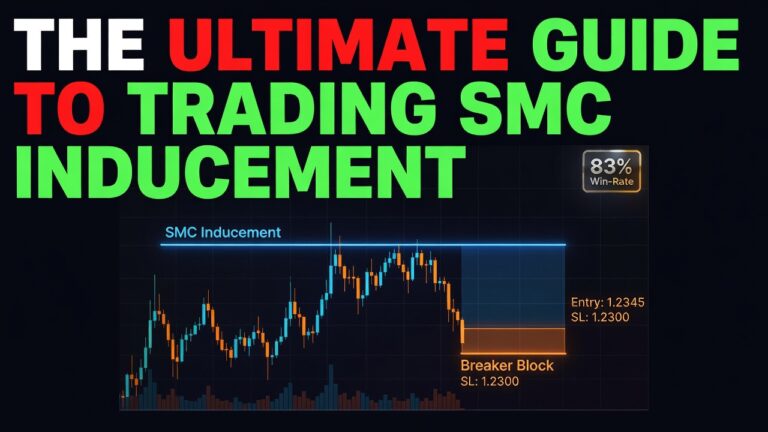
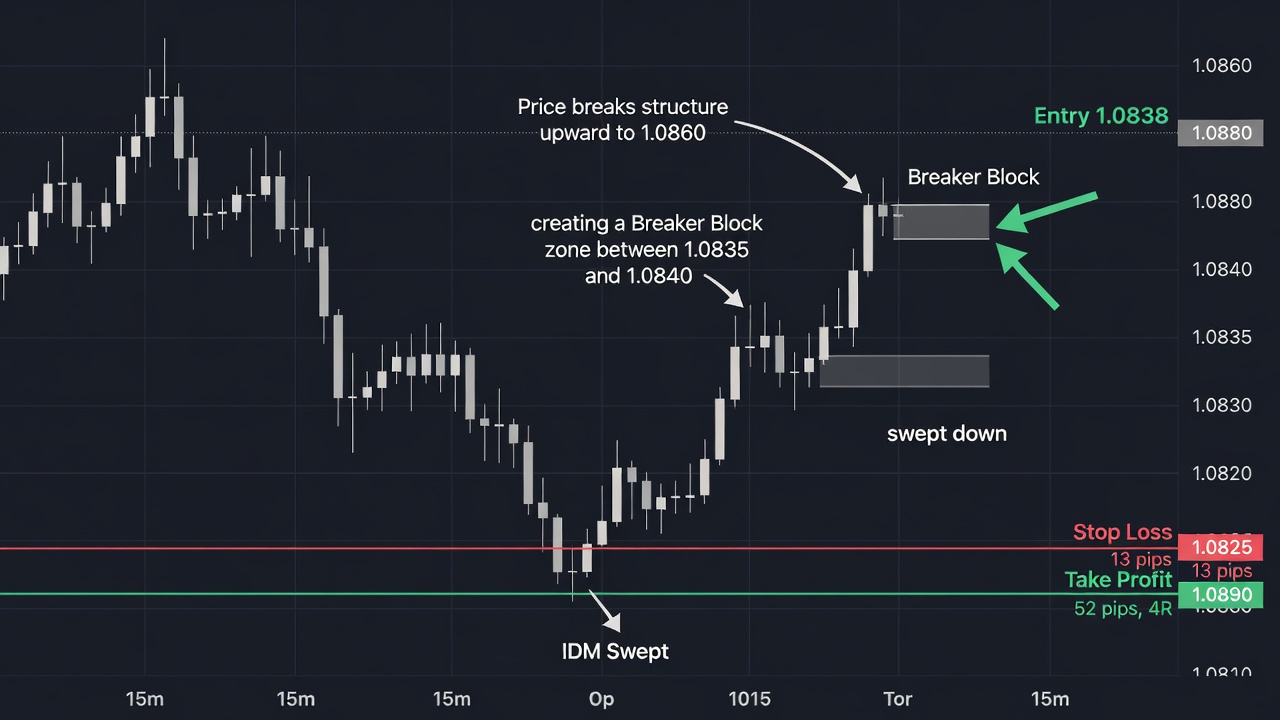
As you can see in the chart above, EUR/USD was trending in a higher-timeframe bullish market structure on the 15-minute timeframe. Price formed an inducement low at 1.0820 before market makers aggressively pushed price down to 1.0815, sweeping liquidity below that inducement point.
Immediately following the sweep, aggressive institutional buying entered the market, catapulting price upward to 1.0860 and breaking structural resistance. This violent impulse move breached the previous order block zone between 1.0835 and 1.0840, turning it into a valid Bullish Breaker Block.
We placed a buy limit order at 1.0838, right at the top edge of the Breaker Block zone. Price pulled back smoothly to test 1.0838, triggering our entry with zero slippage. Our stop loss was set safely at 1.0825 (13 pips total risk, positioned below the sweep low). Our profit target was set at the liquidity pool at 1.0890. Price surged directly into our target within three hours, yielding a clean 52-pip profit for a 1:4 Risk-to-Reward return.
Common Mistakes to Avoid
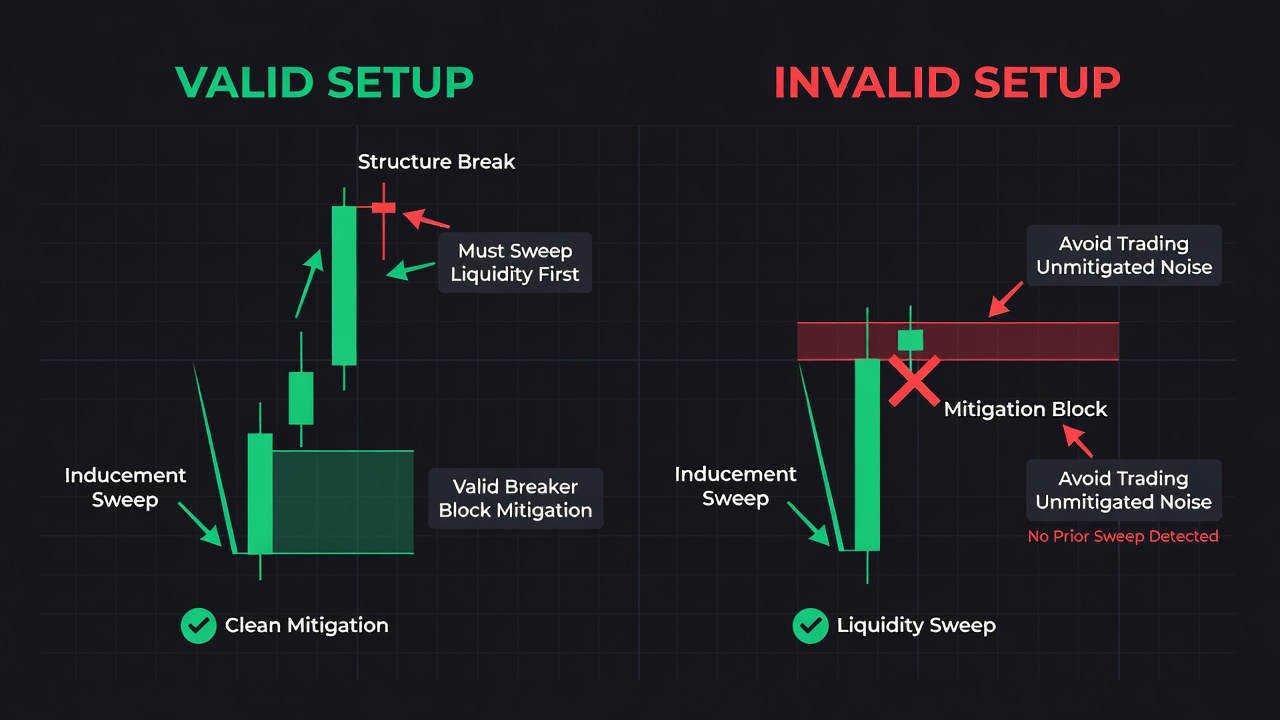
- Trading Mitigation Blocks Without Prior Inducement: Entering breaker block retests where price failed to sweep a clear inducement low or high drastically lowers probability, leading to frequent stop-outs.
- Placing Stops Inside the Breaker Zone: Setting stop losses inside the breaker block body rather than beyond the liquidity sweep structural low leaves positions vulnerable to deep mitigation wick sweeps.
- Confusing Order Blocks with Breaker Blocks: An order block holds price on first contact; a breaker block is an order block that was broken through with strong momentum during liquidity clearing.
- Ignoring Higher Timeframe Bias: Taking bullish inducement breaker setups against a dominant 4-Hour or Daily bearish trend severely cuts win rates. Always align setups with higher timeframe directional order flow.
- Chasing Price After the Impulse: Entering market orders after price has already departed the breaker block zone ruins risk-to-reward ratios. Be patient and let price return to your designated zone.
From Find Better Trades
See The Big Money Move BEFORE The Price Does
Gravity Zone detects hidden institutional accumulation on TradingView — so you’re in the breakout while retail is still waiting for confirmation.

Quick Reference Checklist
- Is the higher timeframe market structure aligned with your trade direction? (Yes / No)
- Did price explicitly sweep a visible Inducement (IDM) liquidity level prior to the setup? (Yes / No)
- Did the impulse move cause a clear Break of Structure (BOS) or Change of Character (CHOCH)? (Yes / No)
- Is the Breaker Block zone cleanly marked from the broken order block? (Yes / No)
- Is your entry set at the Breaker Block with a Stop Loss positioned beyond the sweep extreme? (Yes / No)
- Does the proposed trade offer at least a 1:3 Risk-to-Reward ratio to the next major liquidity pool? (Yes / No)
📈 Want More? Join Our Free Trading Community
- Trading Strategy Guides Telegram — daily strategy tips and market insights
- Find Better Trades Telegram — free trade signals delivered to your phone
- Find Better Trades on YouTube — live trade breakdowns and tutorials