Trading S&P 500 Reversals Using SMC Order Blocks and Volume Profile

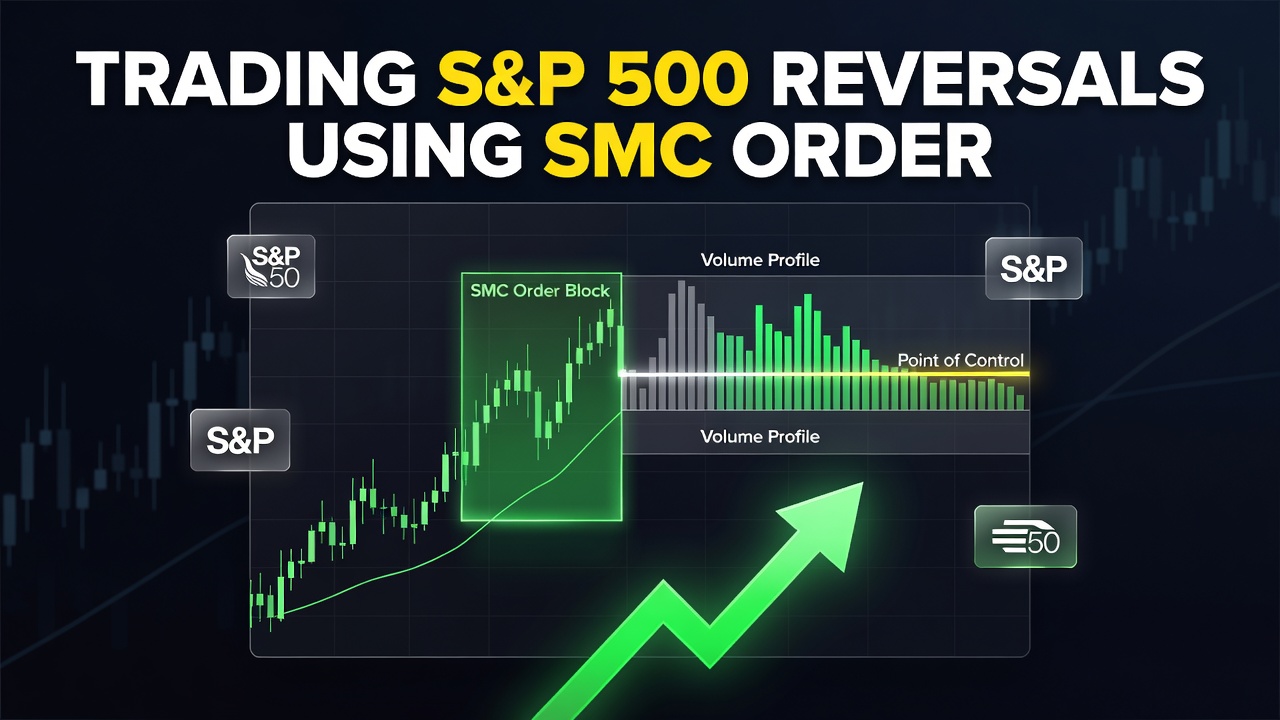
Trading the Consumer Price Index (CPI) release on the S&P 500 is usually a recipe for getting chopped up if you chase the initial spike. However, when you combine Smart Money Concepts (SMC) order blocks with Volume Profile structures, this extreme volatility turns into your cleanest edge. This strategy, designed for intraday futures and liquid ETF traders, exploits the massive liquidity pools engineered by institutional algorithms during high-impact news releases. By waiting for the initial dust to settle, we look for where institutional block orders and high-volume nodes align to catch high-probability, low-risk reversal entries.
What Is SMC Order Block and Volume Profile Confluence?
This strategy is a dual-factor execution model that merges SMC structural footprinting with auction market theory. It identifies specific zones where institutional buyers or sellers have left behind unfilled orders (Order Blocks) and confirms those zones using historical transaction density (Volume Profile). Michael Huddleston (the pioneer of Inner Circle Trader concepts) popularized the identification of Order Blocks, while Steidlmayer’s development of the Volume Profile provides the ultimate volume-based validation. Together, they form an incredibly precise zone of support or resistance that institutions are highly likely to defend.
Why This Edge Works
High-impact economic reports like CPI act as a liquidity catalyst. Algorithmic market makers rapidly expand the spread and sweep retail stop-loss pools (both buy-side and sell-side liquidity) to fill their large institutional books. Once this manipulation phase is complete, smart money capital rapidly displaces the price in the true intended direction, leaving behind a footprint of their entry: a Break of Structure (BOS) and an unmitigated Order Block.
By overlaying the Session Volume Profile, we can see if this SMC Order Block aligns with a High Volume Node (HVN) or the Point of Control (POC). When an order block coexists with a high-volume price level, it proves that heavy real-money positioning occurred at that exact price, not just a rapid price pass-through. This dual-verification eliminates weak, low-volume order blocks and ensures you only execute at levels where massive institutional inventory is committed.
The Setup Rules
- Asset and Timeframe: Trade the E-mini S&P 500 futures (ES) or the SPY ETF using a 5-minute chart for execution, while tracking the 15-minute chart for structural context.
- Macro Event Filter: The trade can only be taken after a major CPI release (typically 8:30 AM EST). Absolutely no trades are opened in the 15 minutes immediately before or after the release.
- Identify Liquidity Sweep: Within the first 15 to 30 minutes post-release, the price must sweep key intraday or daily session highs or lows (Sell-Side Liquidity or Buy-Side Liquidity) and immediately reject.
- Locate Market Structure Shift (MSS/CHOCH): Look for a sharp, aggressive displacement move in the opposite direction of the sweep, breaking the most recent minor swing high (for a long setup) or swing low (for a short setup) on the 5-minute chart. This establishes a Change of Character (CHOCH).
- Identify the Order Block: Locate the consecutive down-close candle(s) prior to the bullish displacement (for a long setup) or up-close candle(s) prior to the bearish displacement (for a short setup). This is your target Order Block.
- Volume Profile Confirmation: Draw a Session or Anchor Volume Profile from the start of the pre-market session. The identified Order Block must align with a High Volume Node (HVN) or the Point of Control (POC). If the Order Block rests in a low-volume void, the setup is invalidated.
Entry Trigger
The Limit Entry Trigger: Place a limit buy order at the proximal open (top boundary) of the bullish 5-minute Order Block, or a limit sell order at the bottom boundary of the bearish 5-minute Order Block, once the confluent volume profile alignment is verified.
The Confirmation Entry Trigger: If you prefer to wait for additional confirmation, enter on a market order only when the price mitigates the confluent Order Block and prints a 5-minute bullish/bearish engulfing candle or a strong pin bar rejection of the Volume Profile POC.
Stop Loss & Profit Target
Your stop loss must be placed precisely 2 ticks below the lowest point of the Order Block (for longs) or 2 ticks above the highest point of the Order Block (for shorts). If the liquidity sweep low is within 5 ticks of the Order Block, place the stop loss 2 ticks below that liquidity sweep low to avoid premature stop-outs during secondary tests.
The initial profit target (Target 1) is set at the 1:2 risk-to-reward ratio mark, at which point you must move your stop loss to break even. Target 2 is placed at the major swing high or low created by the initial CPI spike, which typically offers a 1:3.5 to 1:5 risk-to-reward ratio. This structure ensures that even with a 40% win rate, the strategy remains highly profitable over time.
Trade Walkthrough: What It Looks Like on a Chart
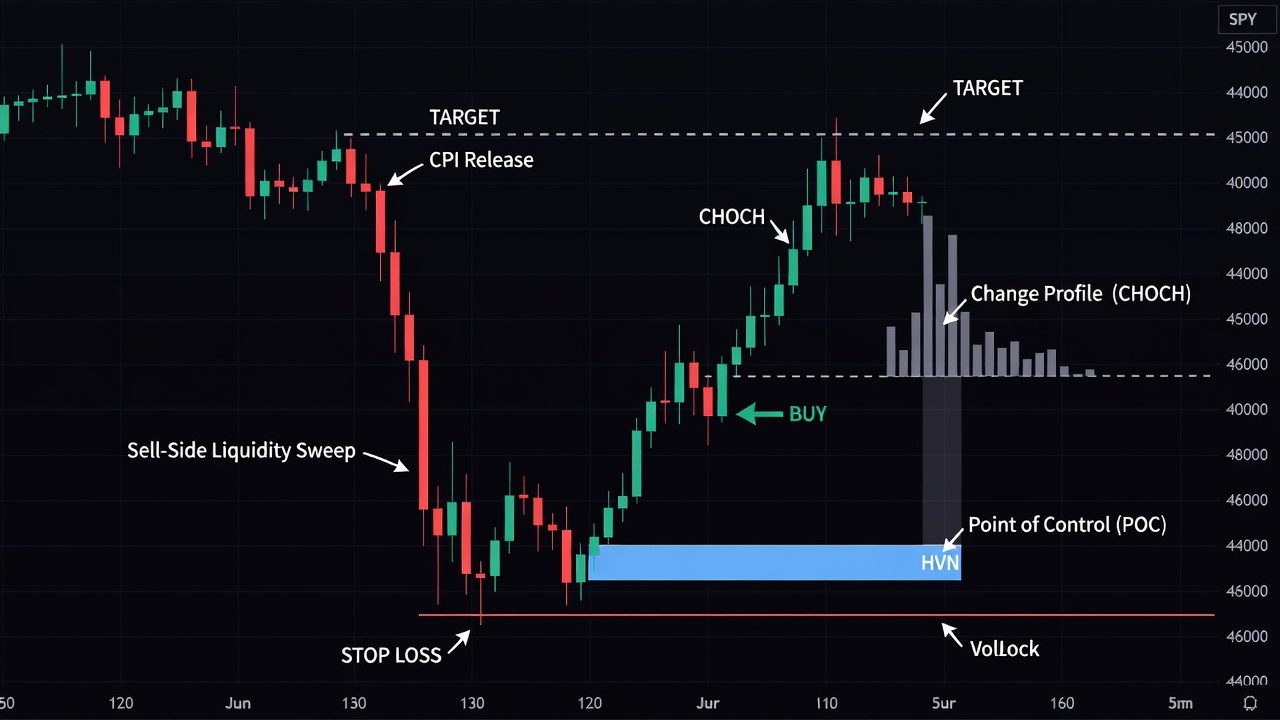
Let’s look at a step-by-step example on the S&P 500 (SPY). As you can see in the chart above, the CPI print is released at 8:30 AM EST, causing an immediate, violent 40-cent spike downward. This rapid move sweeps the London session low, taking out retail sell-stops and filling institutional buy orders.
By 8:45 AM, buyers aggressively step in, driving the price upward and breaking above the 8:35 AM swing high, which confirms a Change of Character (CHOCH) on the 5-minute chart. This sharp displacement leaves behind a clear bullish Order Block (the last consecutive down-close candles) between $502.10 and $502.40.
By pulling the Session Volume Profile, we see that the Point of Control (POC) for the morning session sits exactly at $502.25, directly in the middle of our 5-minute Order Block. We place a limit buy order at the top of the Order Block ($502.40) with a stop loss set at $501.90 (just below the sweep low). At 9:05 AM, the price retraces smoothly to mitigate the zone, tapping $502.30 and triggering our entry. The market immediately finds heavy structural support at the high-volume node and rallies back up to target the initial CPI spike high at $504.40, securing a clean 1:4 risk-to-reward trade.
Common Mistakes to Avoid
- Chasing the initial CPI candle: Entering during the first 10 minutes of the CPI release when spreads are wide and slip is high will destroy your account. Always wait for the CHOCH and the subsequent pullback.
- Trading unmitigated blocks without volume validation: Many order blocks are simply low-volume market pauses. If there is no high-volume node or POC passing through your order block, do not trade it.
- Ignoring higher timeframe structure: Never buy a bullish 5-minute order block if the 1-hour chart is in a strong bearish trend and has just swept a major daily high. Higher timeframe order flow always wins.
- Placing stops exactly on the order block boundary: Algorithms frequently hunt just a tick or two past the exact boundary of an order block. Give your stop-loss order at least 2 to 3 ticks of breathing room.
Quick Reference Checklist
- Is it at least 15 minutes after the CPI economic data release? (Yes/No)
- Did the initial news volatility sweep a major pre-market or session liquidity level? (Yes/No)
- Has a clear Change of Character (CHOCH) occurred via a strong displacement candle on the 5-minute chart? (Yes/No)
- Is there an unmitigated 5-minute Order Block left behind by that displacement? (Yes/No)
- Does the Session Volume Profile POC or a High Volume Node sit inside this Order Block? (Yes/No)
- Is your stop loss positioned safely beyond the structural sweep low/high? (Yes/No)
🎯 Get High-Probability Trade Setups — Free
The Big Dipper Dashboard delivers curated trade ideas straight to your screen every morning. Know what to watch before the opening bell.

📈 Want More? Join Our Free Trading Community
- Trading Strategy Guides Telegram — daily strategy tips and market insights
- Find Better Trades Telegram — free trade signals delivered to your phone
- Find Better Trades on YouTube — live trade breakdowns and tutorials